Hempcrete Wall System @ The HempShed
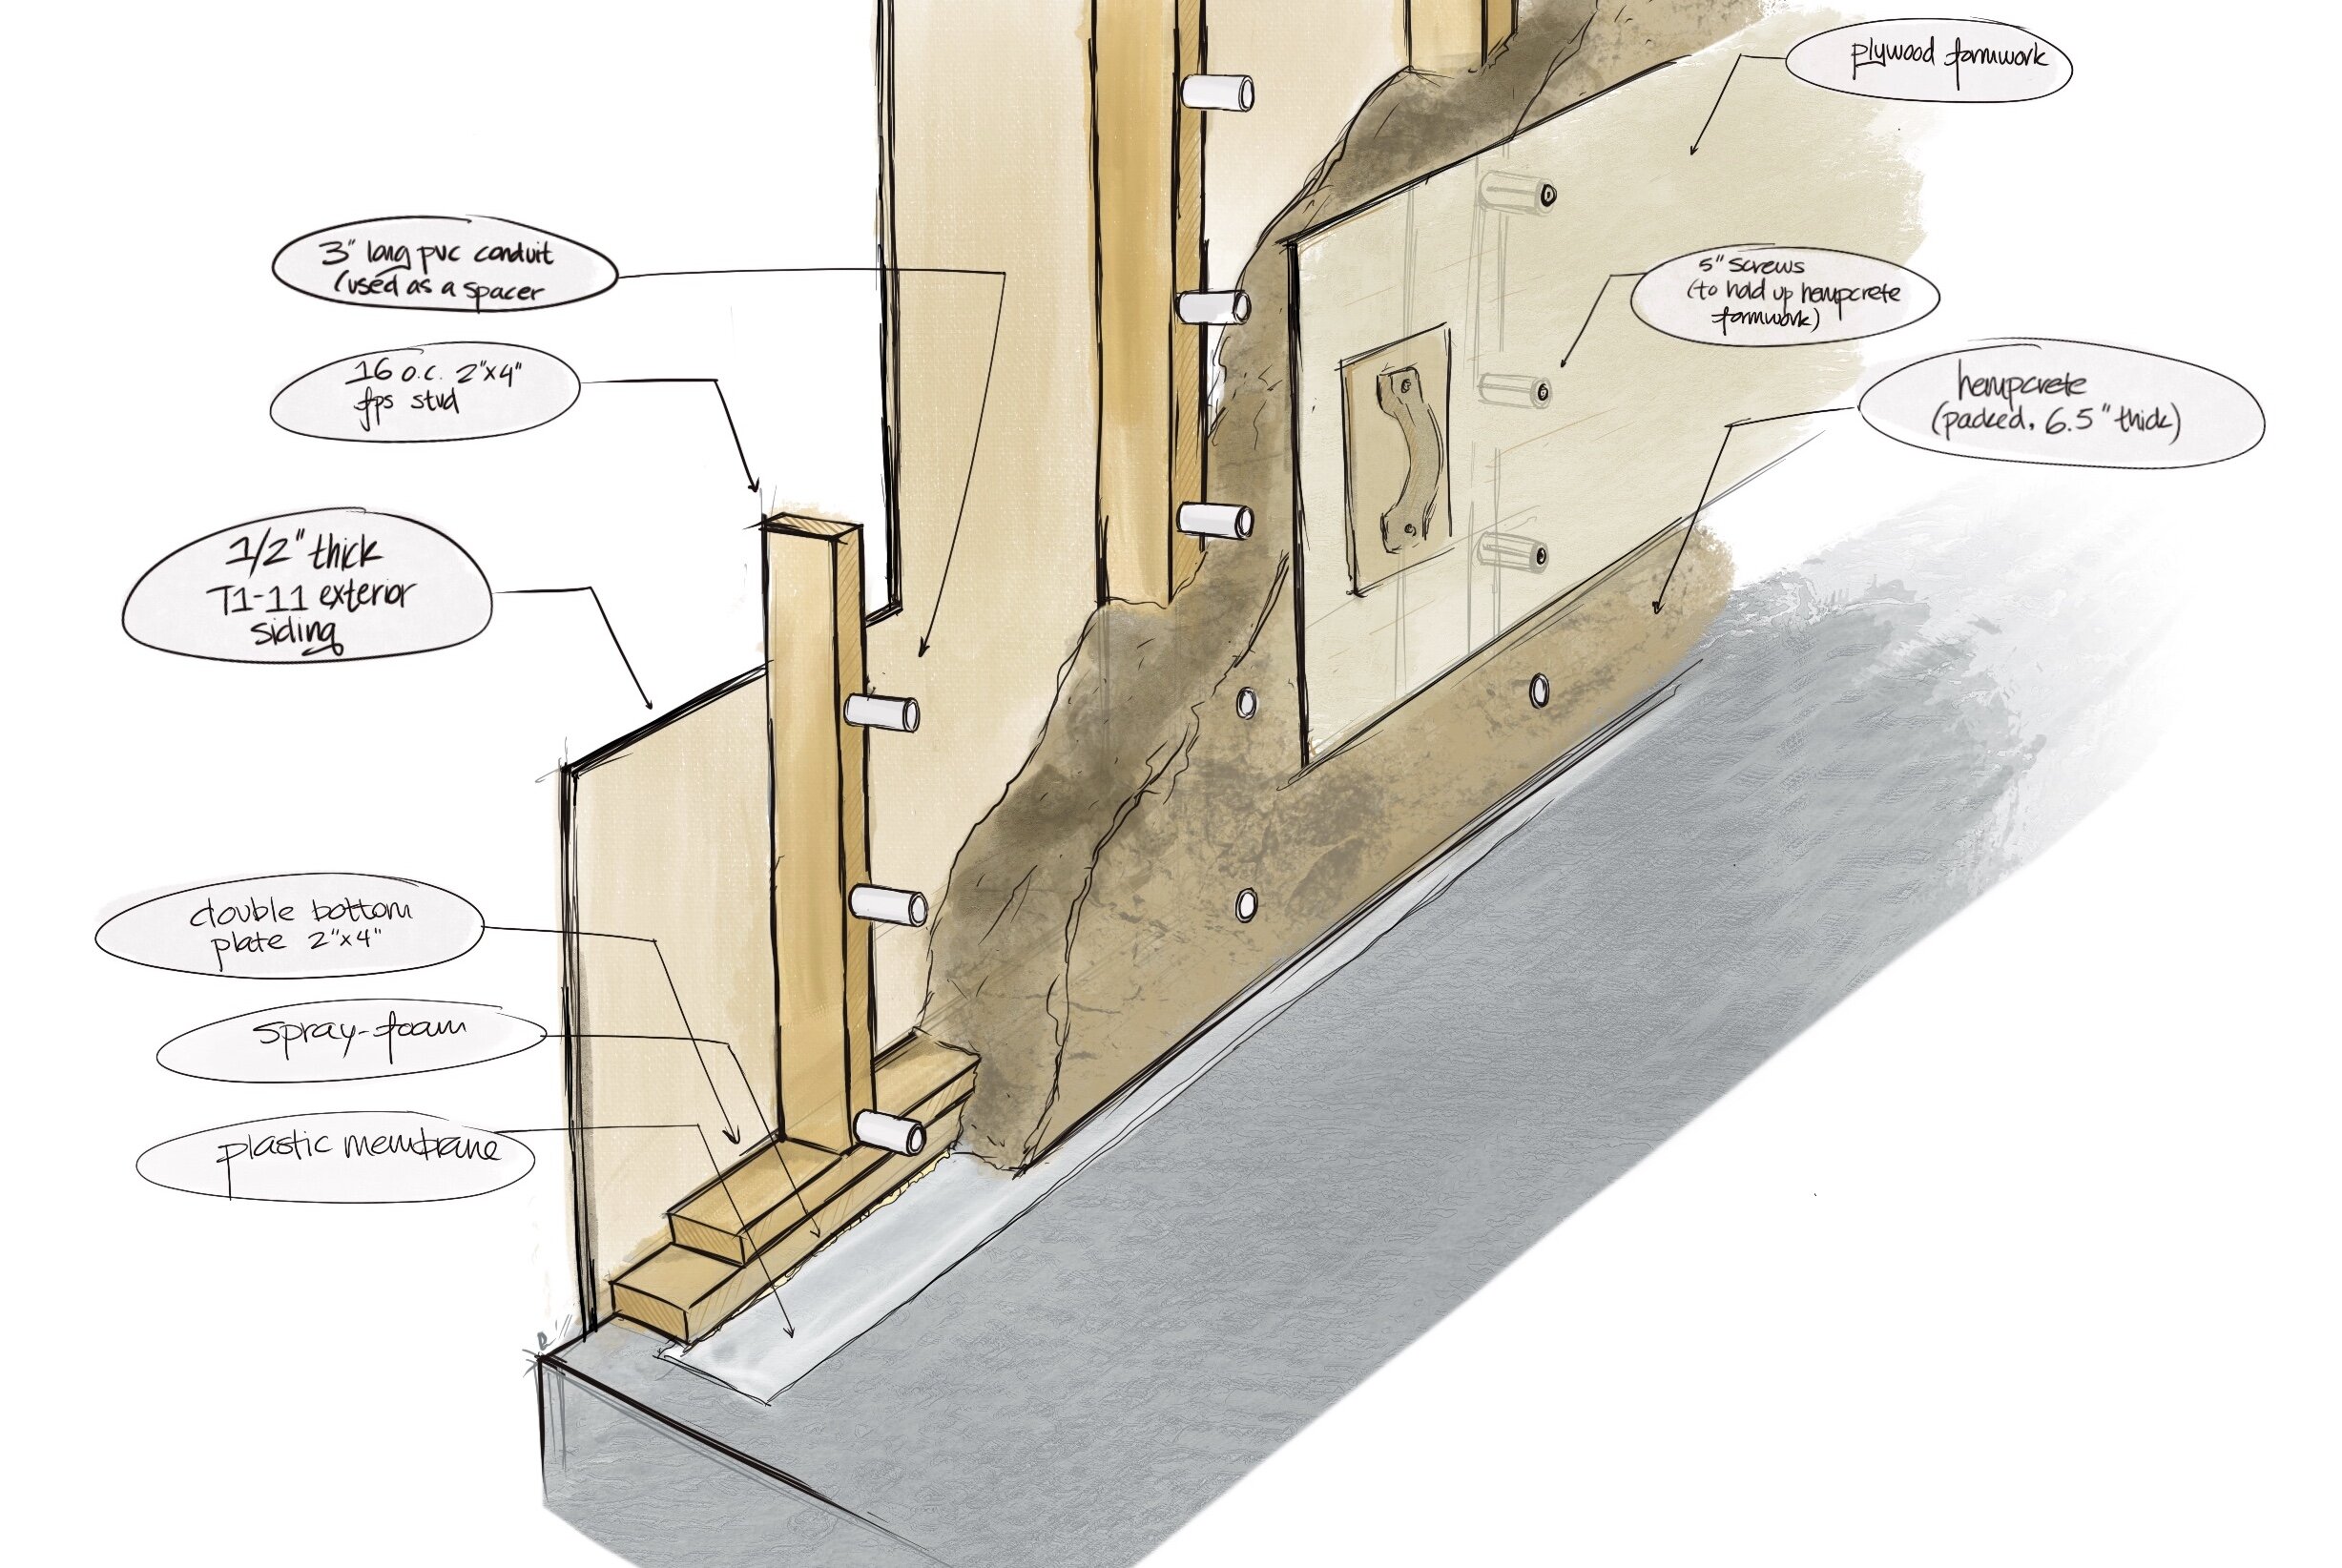
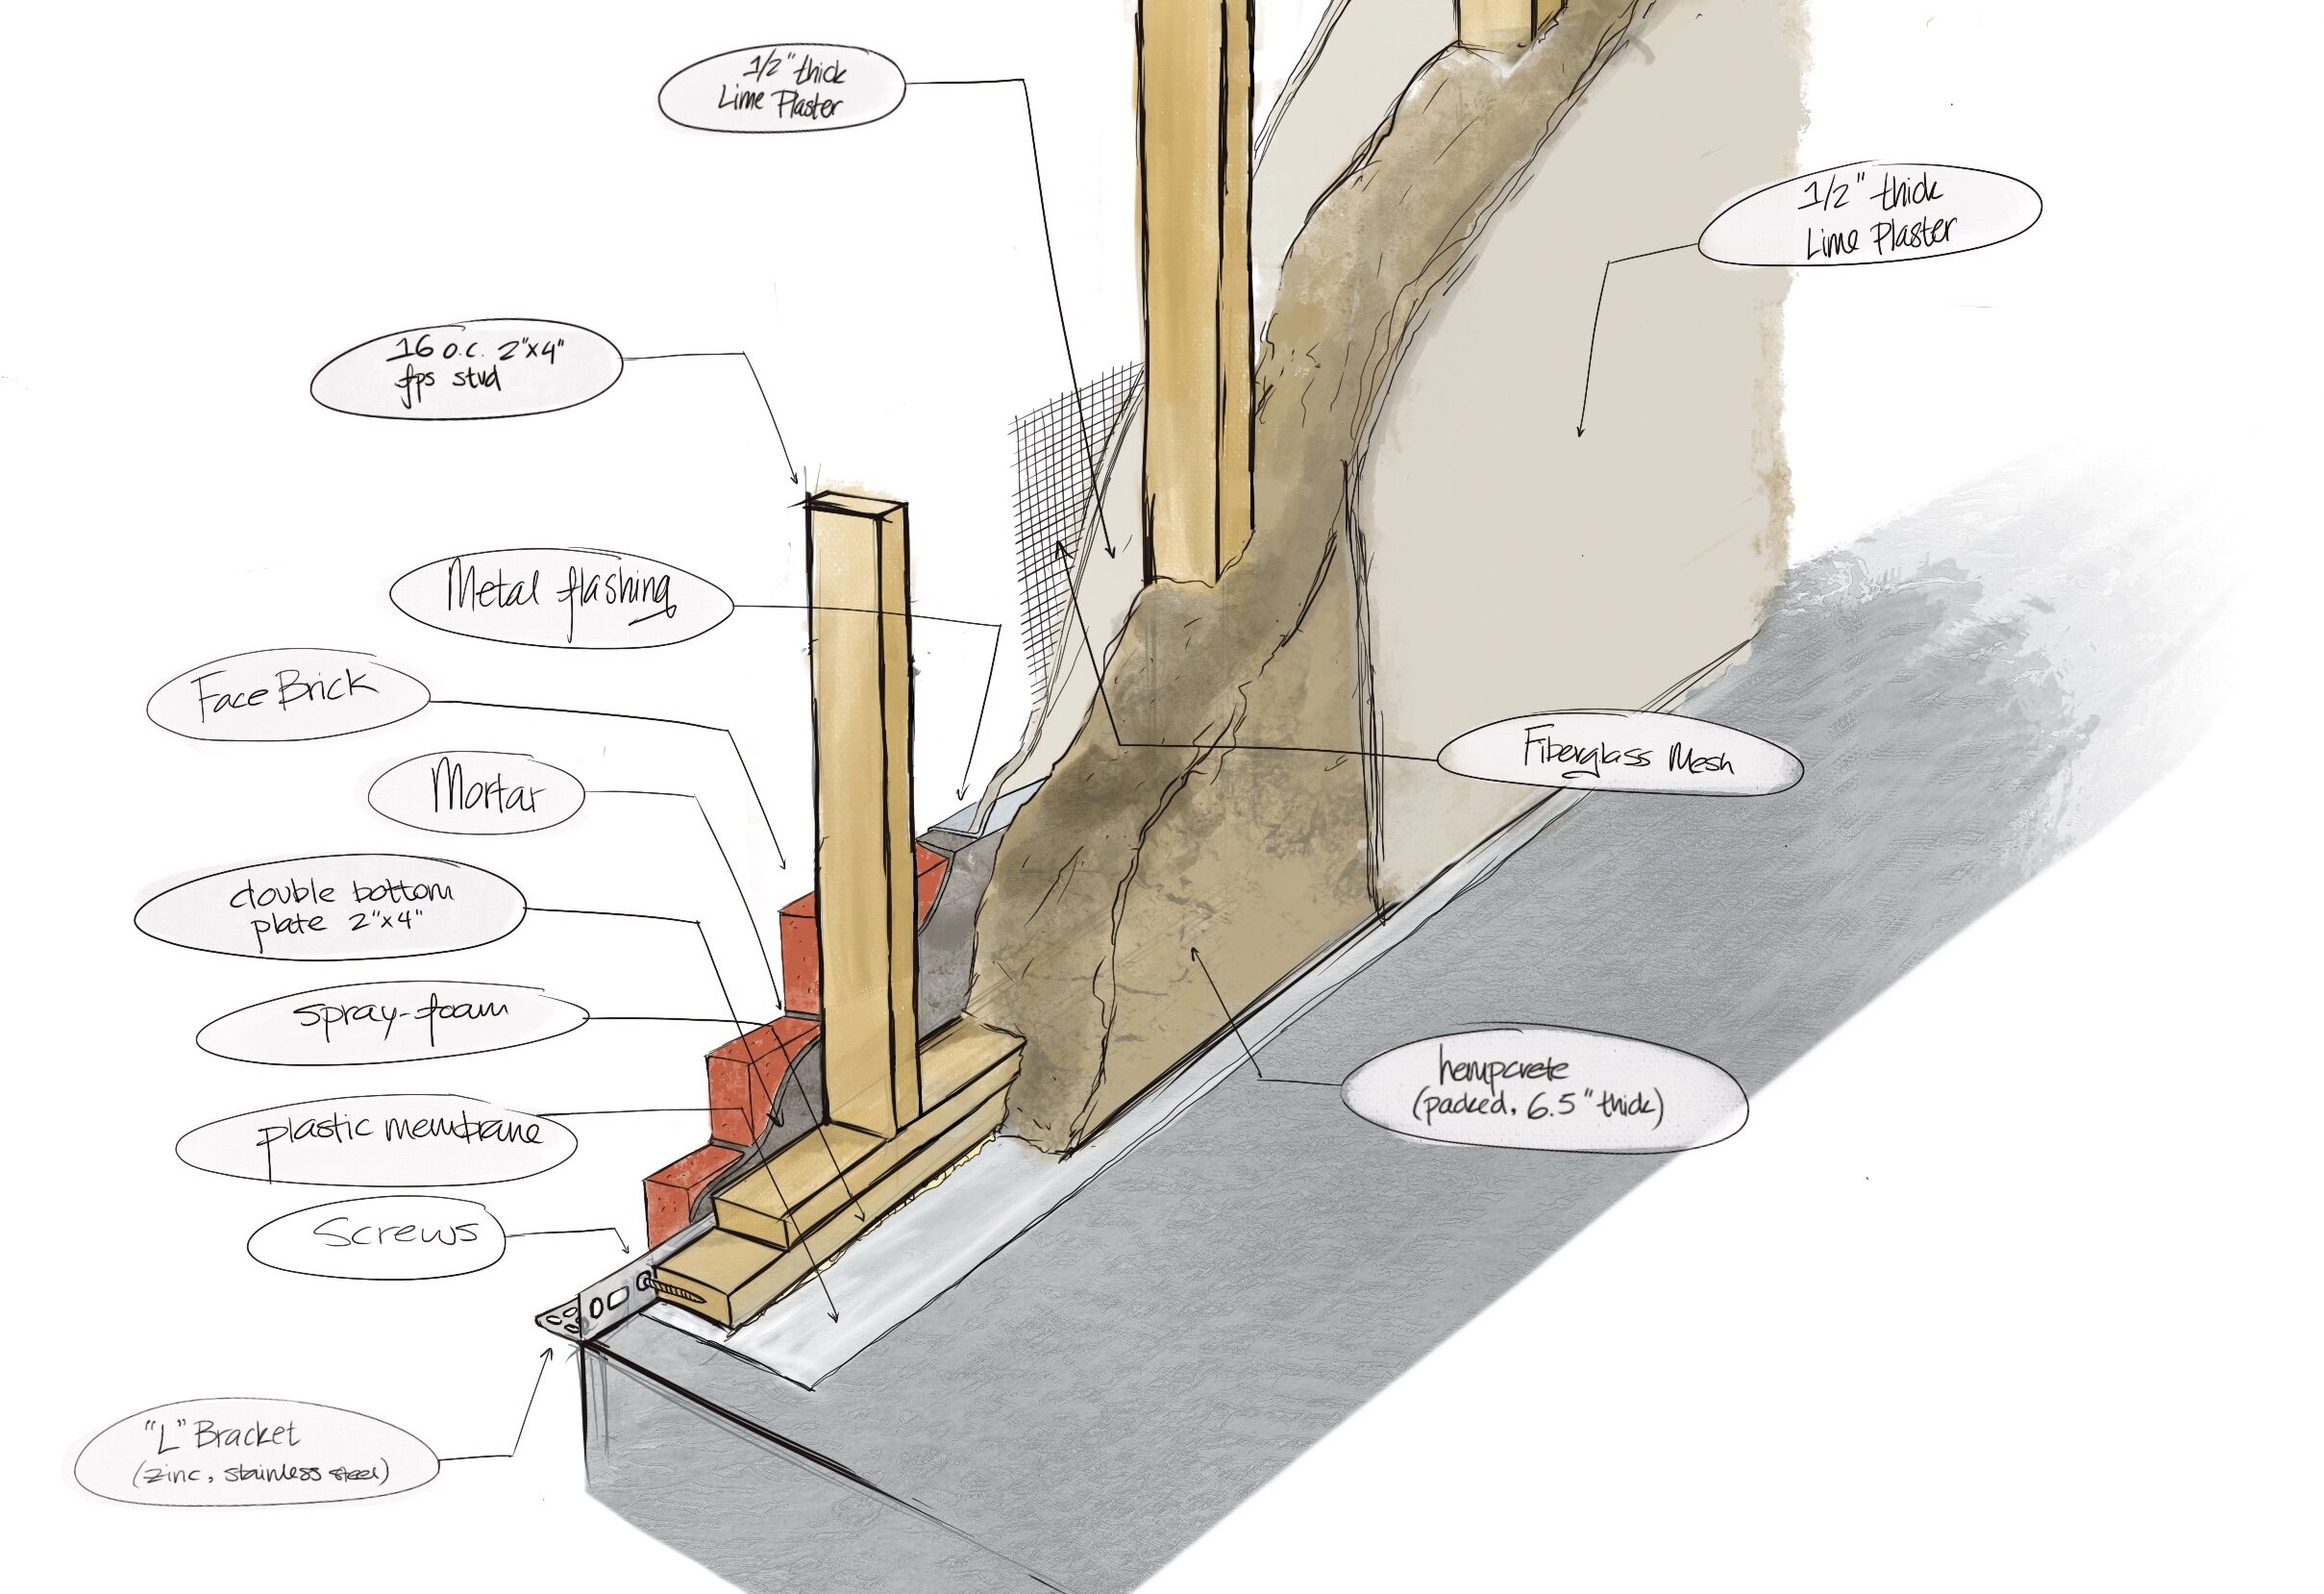
With the coming HempShed trainings, I thought it could be valuable for those attending the courses (and for those who aren’t but are interested!) to see what exactly goes into the wall system of the famed HempShed. I’ve created a couple perspective section drawings that will help showcase not only what the finished product will be, but also what the process of completing a hempcrete wall system looks like.
The Setup:
The HempShed is a small structure framed in the typical methods of a structure located in the northeastern United States. Double bottom plates, studs, and double top plates made of 2” x 4” FPS lumber create the building’s basic structure, and sit upon a concrete slab foundation. 2” x 6” FPS pieces act as ceiling joists, which rest upon the top plates. 2” x 4” pieces also are used for the building’s rafters. The HempShed has a simple gable roof with a 6/12 pitch. Another 2” x 6” piece of wood acts as the ridge piece of the roof framing. Plywood with tar shingles, and T1-11 (a tongue and groove plywood) act as the roofing layer and the siding, respectively.
The Hempcrete:
For our hempcrete install in the HempShed, we first began by putting down strips of plastic membrane directly on the slab, with the edge of the membrane sliding just underneath the bottom plates of the framing. A small amount of spray-foam insulation was added in this crack to create a seal. The reason for this was to make sure that the incoming hempcrete was not sitting directly on any surface that could be wet–which the concrete could be if it was wicking moisture from the ground it sits upon. Although we did the best we could with an existing structure, ideally there would be a consistent vapor barrier between concrete and wood bottom plates. Separation of insulation and moisture is necessary for any cellulostic material.
Once that was set up, small PVC conduits were cut to 3 inches long. These extend outwards from the 2” x 4” studs on the interior side of the system to act as spacers for the plywood formwork, which create the interior barrier for the hempcrete to be up against (the T1-11 on the exterior of the shed acts as the exterior barrier). 5 inch screws go through the plywood formwork and the PVC tubes and screw into the studs to keep everything place. Between the exterior T1-11, the 2” x 4” studs, the conduits, and the interior formwork, there is a 6.5 inch wide cavity which can then be packed with hempcrete. To properly pack the mold, a few inches of hempcrete mix is poured in, and then packed around the edges. When it’s time, the formwork is unscrewed and shifted upwards, leaving some overlap with the now-packed hempcrete so the new material going in doesn’t fall out of the bottom.
The Construction Process of installing Hempcrete.
The Finish:
Once the hempcrete has cured properly, lime plaster will be installed on top of the hempcrete on both the interior and exterior of the HempShed. On the exterior side, fiberglass mesh will be installed within the wet plaster, for added structural support to the material. Although lime plaster is rain-proof, a more protective splash guard consisting of 3 courses of face brick will sit on a zinc brick shelf at the base of the wall system on the exterior of the building. Flashing will be placed on top of the brick to create a tidy and effective seam between the plaster and brick.
The Completed HempShed Wall Assembly.
As a whole, that’s the basic setup of the hempcrete wall system of the HempShed! If you’re interested in learning more, we hope to see you at one of our upcoming or future HempShed courses.
Thanks for reading!
- Graham

